Every vehicle you want to make available for bookings needs to be added to UFOFLEET first. There are two ways — using AI to pull vehicle data automatically from a VIN number, or entering details manually.
How to get there
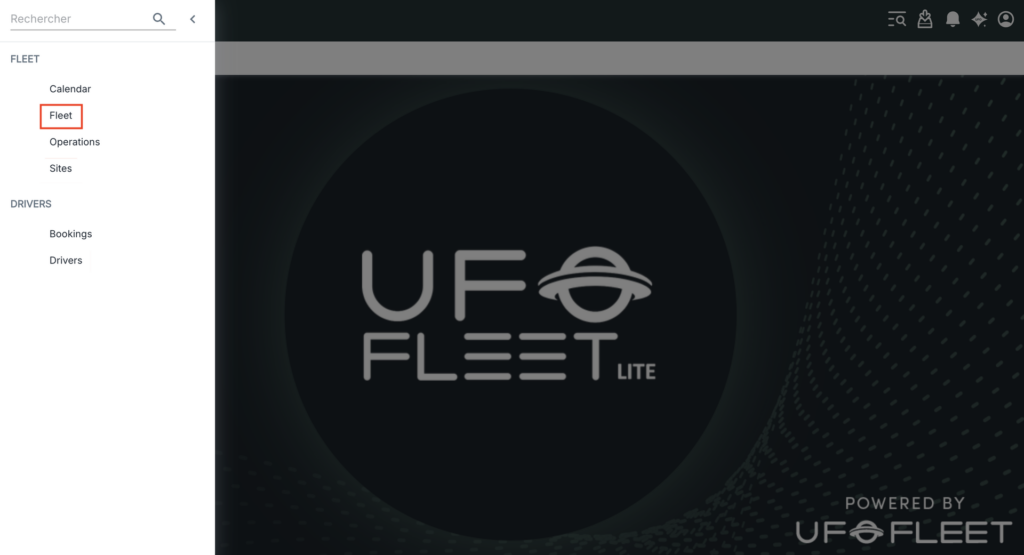
Open the main menu (three horizontal bars, top-left), go to Fleet, and select Fleet.
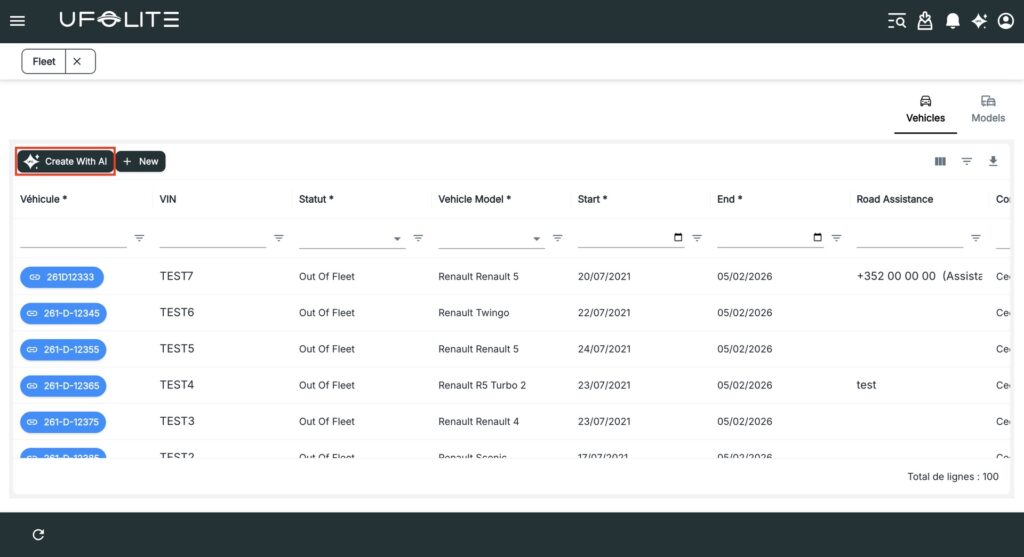
Option 1: Add with AI (recommended)
If you have the vehicle’s VIN number, this is the faster route.
- Click Create with AI
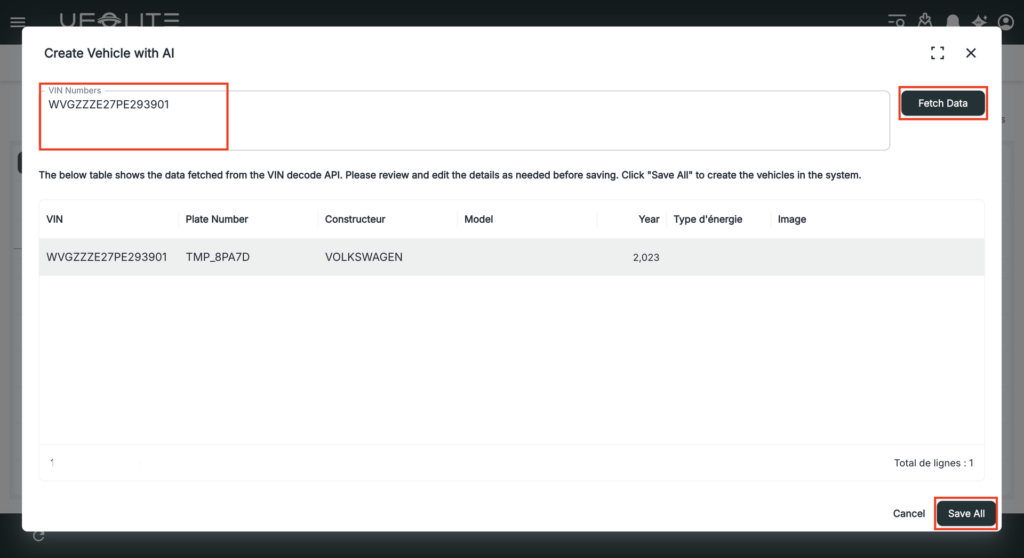
- Enter the VIN number
- Click Fetch Data — the platform identifies the vehicle and pre-fills all details
- Review the details, then click Save All
💡 AI creation reduces data entry errors and is particularly useful when onboarding multiple vehicles at once.
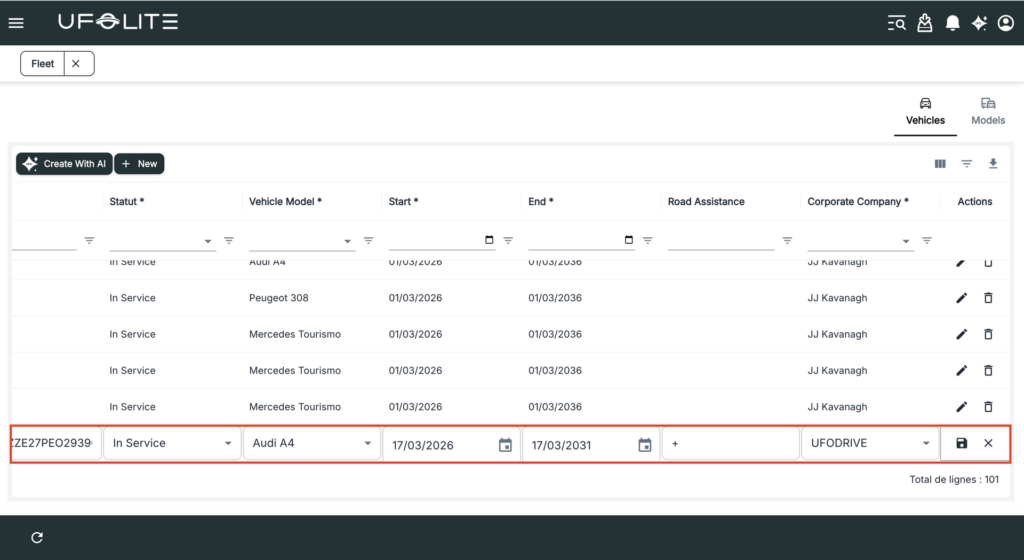
Option 2: Add manually
Click + New to start. Fill in the form that appears at the bottom of the Fleet screen. Required fields:
- Licence plate — must be unique across your fleet
- Vehicle status — see status definitions below
- Vehicle model
- Fleet start date — when this vehicle joins your active fleet
- Fleet end date — if known, when it leaves
- Road assistance number — optional but recommended
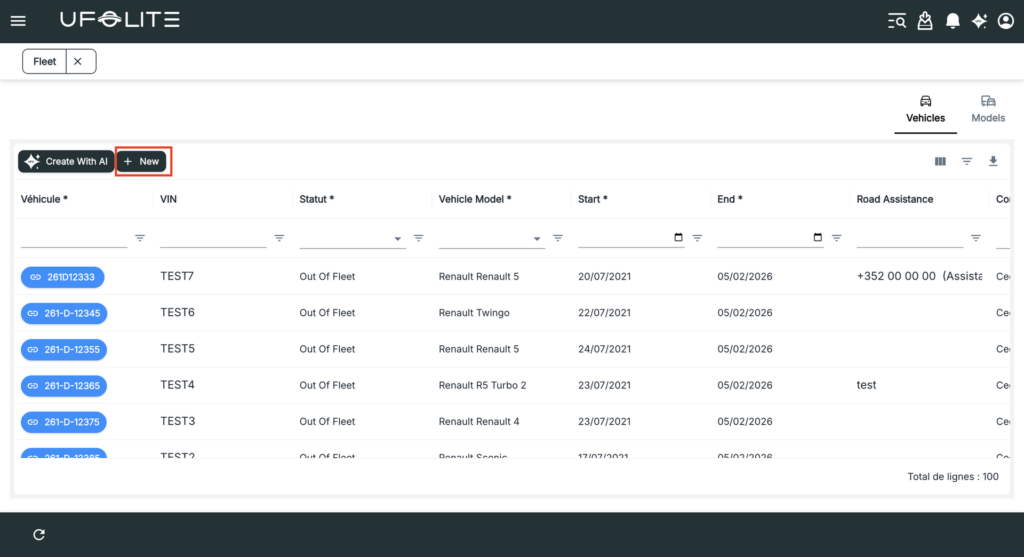

Vehicle statuses
| Status | What it means |
|---|---|
| Planned | Expected but not yet active |
| In Service | Available for bookings |
| Out of Booking | In fleet but temporarily unavailable for rentals |
| Out of Fleet | Retired or removed |
ℹ️ Only vehicles with In Service status will appear as bookable to drivers.